MAKING A FOREST SCENE – TOUCAN BIRD ON BAMBOO TREE
I usually see pictures on Pinterest. With this I get to learn something new from other artists and then try to create something new and different kind of art.
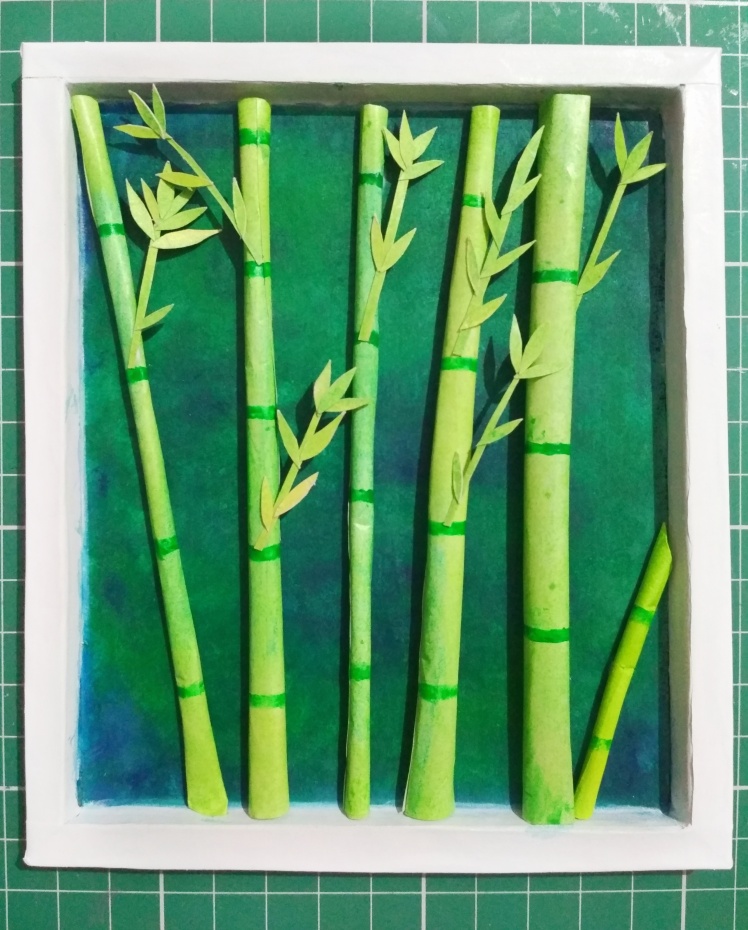
Just like that, one day I was seeing pictures on Pinterest & then I saw a beautiful picture which was of a Bamboo tree. So, seeing that, I thought of making a Paper Bamboo. Even making bamboo tree, the frame was not looking good…I mean, something was still missing on it. That’s why I decided to add some leaves, flowers and a Toucan bird.
So, see the process what I’ve done and make a beautiful forest scene craft.
MATERIALS REQUIRED:
• Paper frame
• 3 thin paper (90 GSM)
• 2 thick paper or Cardstock paper
• Acrylic paint, Oil Pastel
• Paper Cutter, Waterproof gel pen(black)
• Tissue paper
• Fevicol
PROCESS:
For bamboo tree:
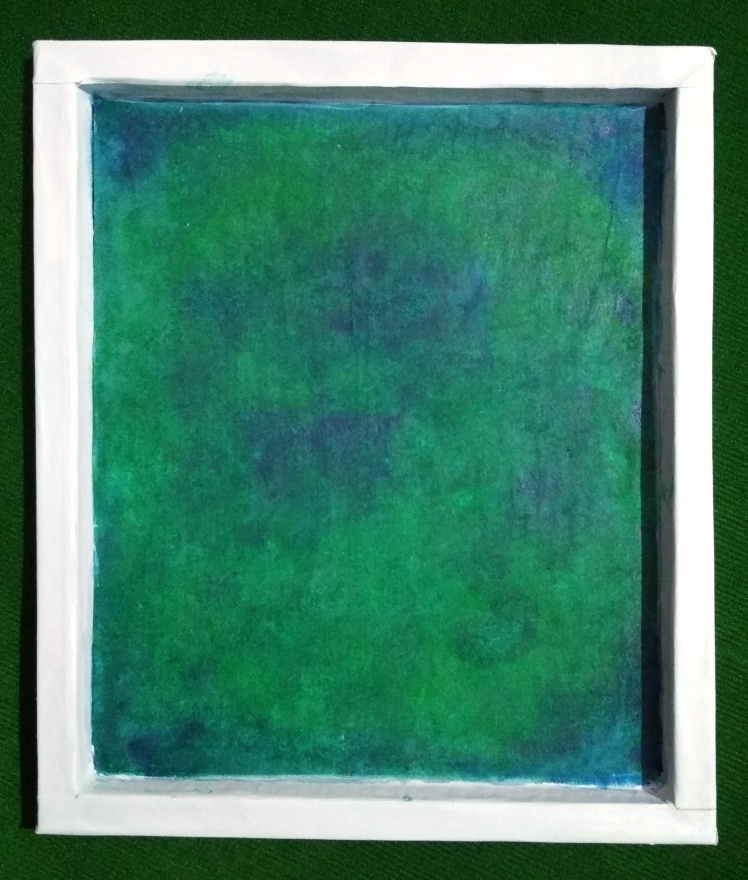
1. Click here to make Paper frame. Cover all four sides with white paper and then you can colour it or leave it white.
2. Paste two paper of 90 GSM inside the frame. This is done because when you’ll apply acrylic colour then the paper will not buckle/bulge. If you’ll keep two layers of paper then there is very less chance of Paper buckling.
3. For background, mix blue & green colour and apply it on the paper. Again apply second layer. At last, without mixing both the colours, now apply green colour to some parts & blue colour at the corners and at middle.
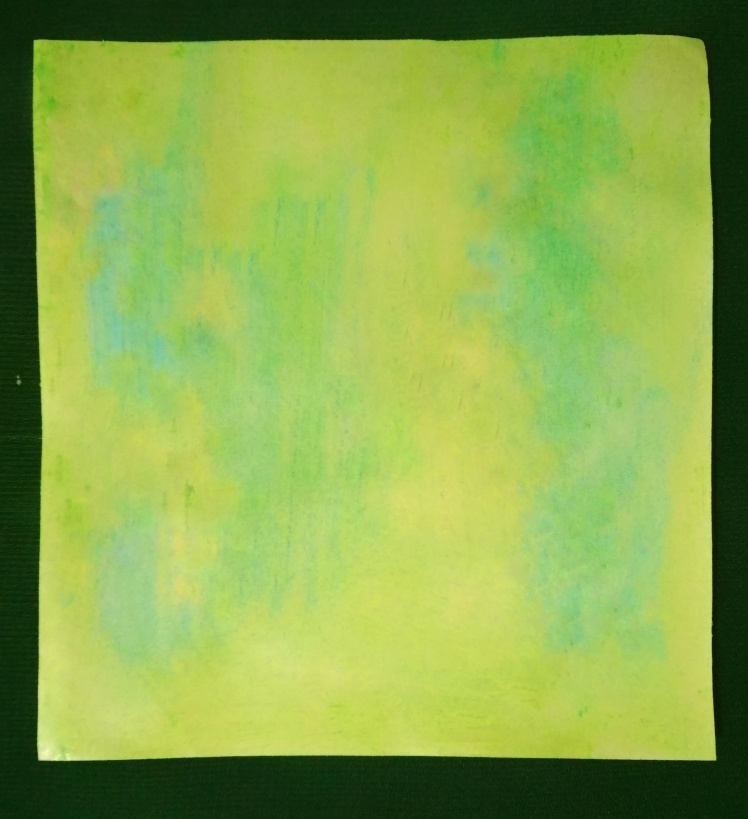
4. According to the size of inside frame, take a plain paper and apply green (light,dark) oil pastel and blend it using tissue paper.
5. Cut the paper with 1.5 cm, 2 cm & 2.5 cm width. Different width will give different thickness of bamboo.
Roll the paper & glue it’s end.

See the last left side of rolled paper, that paper is little bit bend/curve shape. So you’ve to do like that.
6. Using acrylic paint (without water), colour around the rolled paper.

For bamboo leaves:
7. Take a thick paper/cardstock and apply light green & yellow oil pastel and blend it using tissue paper.

8. Cut paper in long shape and with that same paper cut for leaves.

Glue the leaves with branches.

For Toucan bird:
9. Draw the body part, wing & feathers of Toucan bird. Cut all of them using paper cutter.

10. Colour the body part & beak.
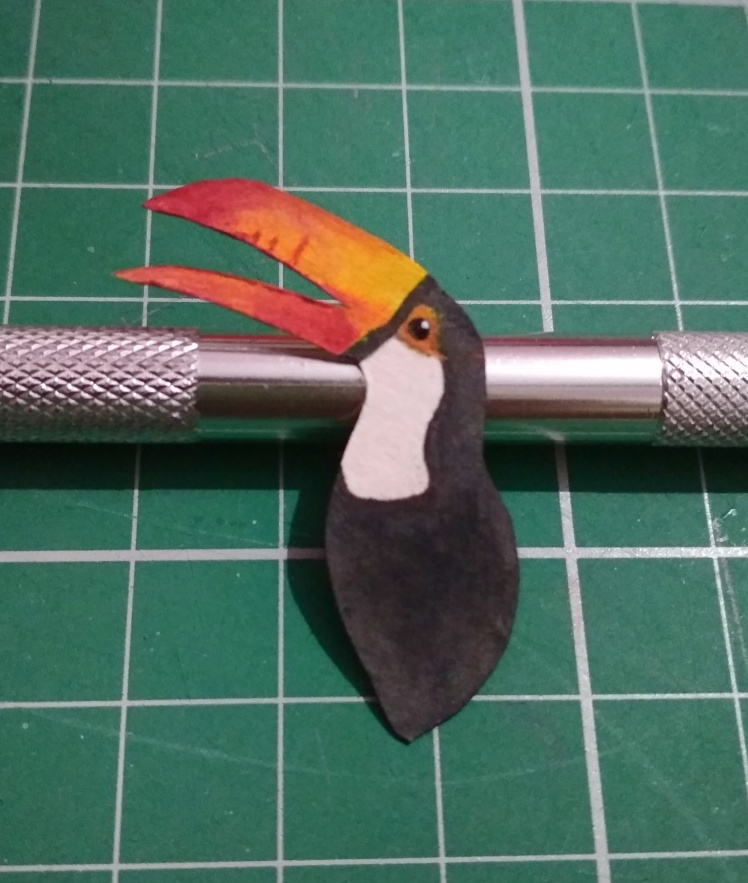
If you’ve the knowledge of shading then you can colour it properly.
11. Colour the wing with grey colour and using black gel draw it’s wingbars.

12. Now colour one side of the feather with grey colour & other side with black. On one feather, mark a white line.

13. Draw claws & cut it out, then colour it.

Join all the body parts.
14. Take a curve bamboo tree which you’ve made earlier. Stick the bird behind the tree. Also attach the claws on the tree.

15. Now if you will see from side, then just above the claws there will be some space. So using gel pen, cover that area to give a proper illusion of claws.

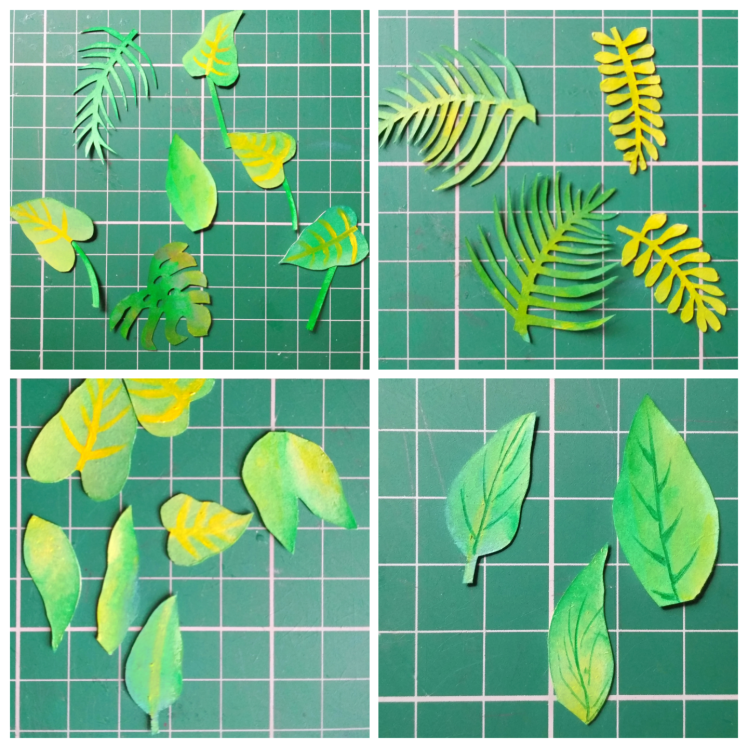
For leaves:
16. Draw the shapes of different types of leaves and cut it out. Using acrylic colour, paint all the leaves.
For flowers:
17. Again draw some flowers, cut it out & colour it.

18. Now, it’s time to fix all the things. First of all, attach bamboo.

Next, attach the branches with leaves.
At last, fix all other things left.

And now you’re done!
Look how beautifully you made this. If you loved making this then comment below and share this with your friends, relatives. I would love to see your comments.

Waoo..its awesome.
LikeLiked by 1 person
Thanks.. 😄
LikeLike
Oh, I love this. Thanks for sharing your creative process. Your work is beautiful!
LikeLiked by 1 person
Thanks a lot… 😄
LikeLike
Very attractive, lovely and interesting crafts! Adorable, in fact!
LikeLiked by 1 person
Thank you so much.. 😄
LikeLike
Beautiful – the colours have a lovely glow!
LikeLiked by 1 person
Thanks a lot. 😄
That’s the Magic of colours, for which anything can look nice. 🤗
LikeLiked by 1 person
great idea’s….outstanding talent u have…keep it up
LikeLiked by 1 person
Thank you so much.. 😊
LikeLike
Reblogged this on kelleysdiy and commented:
I came across this adorable art project and thought it would be such a wonderful project to do for yourself, or with the kids. I hope you enjoy it as much as I did!
LikeLiked by 2 people
Thanks for sharing my post.. 🤗😊
LikeLike
Very nice, thank you for sharing.
LikeLiked by 1 person
My pleasure 😊😄
LikeLiked by 1 person